Main Factors that Affect Costs To Tile a Bathroom
Consider all of the materials (not just the tile itself!) plus labor to get a true picture of what it’ll cost to tile a bathroom
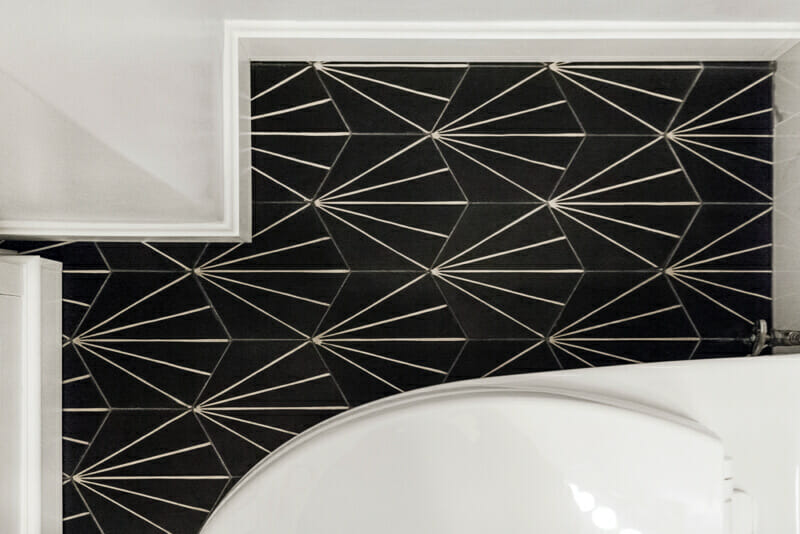
When budgeting for a bathroom tiling project, it’s easy to become focused on the cost of the tile itself. After all, tile is at the heart of the project; it’s the main look of all of this. However, crucial (and often overlooked) steps like prep and time for labor can impact how much it’ll cost you to tile a bathroom.
In this guide, Sweeten outlines three categories that go into the cost to tile a bathroom: prep, materials, and labor.
Sweeten matches home renovation projects with vetted general contractors, offering guidance, tools, and support—for free.
Tiling prep work
Before beginning the tile project, a number of items in the bathroom must be removed. After they have been removed, the subfloor must be assessed.
Using ceramic tile in your bathroom?
Ceramic tile requires a stable base (substrate) that is rigid and does not bend. The bathroom’s existing subfloor should either be strong enough or it should be strengthened. For natural stone tile, the industry group Ceramic Tile Education Foundation (CTEF) recommends that the substrate be twice as rigid as for tiling with ceramics or porcelains. If the substrate is not smooth enough, it may require an additional layer of underlayment.
Removing bathroom items
- Toilet: The toilet must always be removed before tiling a floor. The toilet will either be replaced, or a new toilet may be installed.
- Baseboards: Wall baseboards and any type of horizontal wall molding that touches the floor must be removed before tiling.
- Door casing: Door casing—the vertical trim that forms a door frame—usually doesn’t need to be removed. Tile workers can cut the bottom of the casing and fit the tile underneath.
- Shower/bathtub and bathroom cabinet: Showers, tubs, sink cabinets, and any permanent pieces do not need to be removed. However, sometimes they are removed during a full bathroom remodel.
Preparing (or repairing) the subfloor
When installing tile in a remodeled bathroom, it is common to find a damaged subfloor. This damage tends to be concentrated around the toilet, sink, and shower/bathtub. If you are removing the shower or bath, you may find even more damage under the shower pan or bathtub.
Sometimes, large sections of the subfloor may need to be removed and replaced with a new subfloor. In some cases, the damage may extend to the floor joists (the beams below the subfloor). Both of these fixes are separate from the tiling.
If you are working with a general contractor, the contractor will remove all of the necessary items and make repairs. This prep work should be done ahead of time before the tile subcontractor begins.
While removing items is heavily a labor cost, some materials may figure in. This depends on the scale of the project. For example, large projects may require the rental of a dumpster.
Raw materials for prepping
Though tile is the most visible feature of bathroom tile, a support system of other materials makes a bathroom tile surface possible.
Subfloor prep materials
- Solid subfloor: Exterior-grade, tongue-and-groove plywood is a standard subfloor material.
- Underlayment on top of subfloor: Many tile pros recommend laying down an additional layer of thin cement board on top of the subfloor.
- Leveling compound: Dips in the subfloor can be corrected with a liquid leveling compound. Poured directly onto the subfloor, this compound is self-leveling. It fills gaps up to 1-1/2-inch deep.
Tiling materials
Thin-Set Sweeten brings homeowners an exceptional renovation experience by personally matching trusted general contractors to your project, while offering expert guidance and support—at no cost to you.
Thin-set is a mortar base that is applied to the subfloor before laying tiles. It acts as an adhesive, securing the tiles to the surface. Thin-set comes in various types, including Portland cement-based, polymer-modified, and latex-modified. The choice of thin-set depends on factors such as the type of tile, the subfloor condition, and the desired level of adhesion.Renovate expertly with Sweeten
Grout
Grout is a cementitious material used to fill the joints between tiles. It serves both aesthetic and functional purposes, enhancing the appearance of the tiled surface and preventing moisture penetration. Grout comes in a wide range of colors, from traditional neutrals like gray, black, cream, and white to vibrant hues that complement the tiles.
Grout Tint
While grout is typically available in standard colors, it can also be tinted to achieve virtually any desired shade. Grout tint is a coloring agent that is mixed with the grout to create a custom color. This allows for greater design flexibility and the ability to match grout to specific color schemes or accent elements.
Grout Sealant
Grout is a porous material that can absorb moisture and stains. To protect the grout and maintain its appearance, it is essential to apply a grout sealant. Grout sealant forms a protective barrier on the surface of the grout, preventing moisture infiltration and making it easier to clean. Regular application of grout sealant helps to prolong the life of the grout and maintain its original color.
Haze Remover
The grouting process often leaves behind a light haze on the surface of the tiles. This haze can dull the appearance of the tiles and detract from the overall aesthetic. A haze remover is a specialized cleaning product designed to remove this residue. It is typically a liquid solution that is applied to the tiles and then wiped away with a clean, soft cloth. Using a haze remover ensures that the tiles maintain their luster and shine after the grouting process is complete.
Optional materials
- Uncoupling material: When installing tile on concrete, many tile professionals recommend that you use a special material to avoid cracking. An uncoupling material disconnects the tile from the concrete slab. This prevents concrete from transmitting cracks to the tile. CTEF recommends that all concrete floors with pre-existing cracks be installed with uncoupling material.
- Radiant heating: To combat cold tile floors, many homeowners opt for radiant heating underneath the tile. This electrically operated mesh is embedded in the thin-set mortar. It is controlled by a wall thermostat.
Time and cost of labor
DIY vs. Professional Installation
While many home improvement projects can be tackled by DIYers, tilework is a complex craft that requires skill and precision. Attempting to lay tile without proper knowledge and experience can lead to mistakes, wasted materials, and an unsatisfactory final result. Hiring a professional tile contractor ensures a quality installation, saves time and effort, and ultimately pays for itself.
Cost Breakdown
When obtaining estimates for bathroom tile installation, it’s important to clarify whether the cost of materials (thin-set, grout, etc.) is included in the labor cost. If not explicitly stated, it’s likely included in the overall price. Understanding this breakdown will help you compare costs and make informed decisions.
Multiple Visits and Labor Costs
One factor that can affect the cost of tile installation labor is the need for the contractor to return to the job site multiple times. After setting the tiles, a waiting period of at least 24 hours is necessary before grouting. Grouting requires additional time, usually around 4 hours, before the grout haze can be removed. These multiple visits can impact the overall labor cost.
Additional Factors
Beyond the factors mentioned above, other elements can influence the cost of bathroom tile installation:
- Tile complexity: Intricate tile patterns, mosaics, or large-format tiles may require more specialized techniques and increase labor costs.
- Subfloor condition: If the subfloor requires preparation or repair before tiling, this can add to the overall project cost.
- Accessibility: The layout of the bathroom, including any obstacles or limited access, can affect the efficiency of the installation and potentially increase labor costs.
- Location: Geographic location can influence labor rates and material costs.
- Design choices: The style and color of the tiles, as well as any additional features like border tiles or decorative accents, can impact the overall cost.
Ready to get paired with an expert contractor to retile, remodel, or fully gut your bathroom?
—
Not sure which big-box cabinet retailer to use? Sweeten explains the difference between IKEA, Lowe’s, Home Depot, and Cabinets To Go.
Take a look at five classic styles of bath tile that Sweeten homeowners chose for their bathroom renovations.
Ready to renovate? Start here!
Here you can learn more about our services and locations. Alternatively, browse more home renovation inspirations, processes, and cost guides.

