An Architect Drafts a Plan for His Leak-Prone Apartment
After three run-ins with extensive water damage, Brooklyn homeowners Brad and Michelle took on a kitchen, bath, and floor renovation to restore and update their pre-war Fort Greene co-op. Today, Brad shares their renovation story and walks us through the process of wrangling insurance claims and partnering with a team of contractors they met through Sweeten to re-create the most beloved elements of their home and add a few design twists to make it their own.
Homeowner guest post by Brad, Fort Greene homeowner
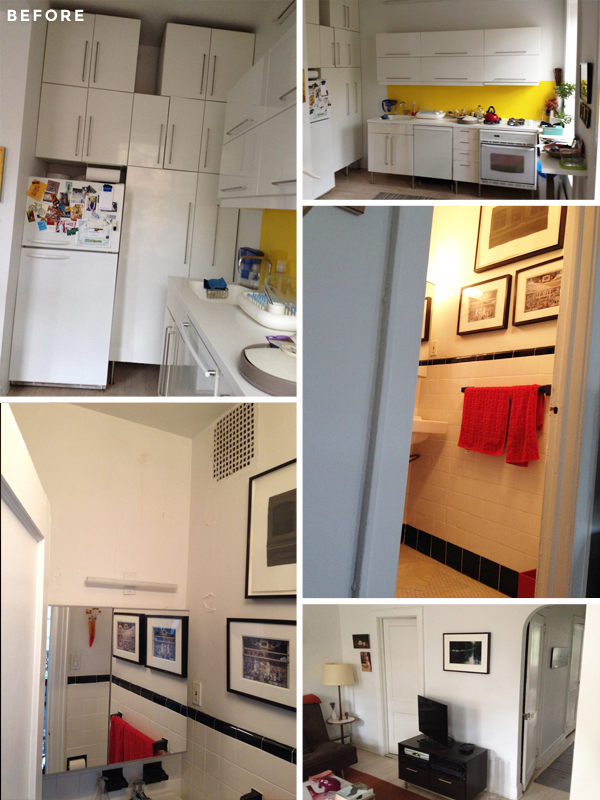
Like a lot of first-time NYC buyers, when my wife, Michelle, and I purchased our two bedroom Fort Greene co-op nearly ten years ago, we had to stretch ourselves financially. One of the main reasons that we were able to make it work was that the apartment, although in a pre-war brownstone, was in great condition and didn’t require any renovation. In fact, we were especially happy with the contemporary kitchen that the prior owner, an architect like myself, had installed. It was a great contrast to the more traditional, yet clean, moldings and lines of the rest of the apartment.
Water Damage: Act I
A few years ago, we got our first chance to use Sweeten. Our master bathroom had suffered damage from a water leak in the apartment above. Even though I am an architect, I didn’t know any contractors in my network that could do the work economically since it was such a small project. But Sweeten quickly connected me with a contractor who did a great job restoring the walls and ceiling. Since then, I’ve been a huge Sweeten fan, recommending it to friends as well as using it to find contractors for my own clients’ projects.
Water Damage: Act II
Déjà vu. A year ago, our powder room suffered water damage from a burst pipe above us. Again, a small job. But this time, I looked at the possible repair differently. The powder room used to be a full bathroom, but the prior owners had removed the tub with the hopes of installing a washer/dryer. The co-op board stopped them because of – you guessed it – potential wear on the building’s old pipes. When we moved in, I set some older IKEA cabinets where the tub used to be, but it never looked finished. The other thing that bothered me about the powder room was that it opened directly into the living room. This limited our furniture configuration and wasn’t great for privacy when we were entertaining. I began to hatch a plan to re-orient the powder room entrance to the hallway that connects the front living, dining, kitchen area with the back bedrooms.
Water Damage Act III:
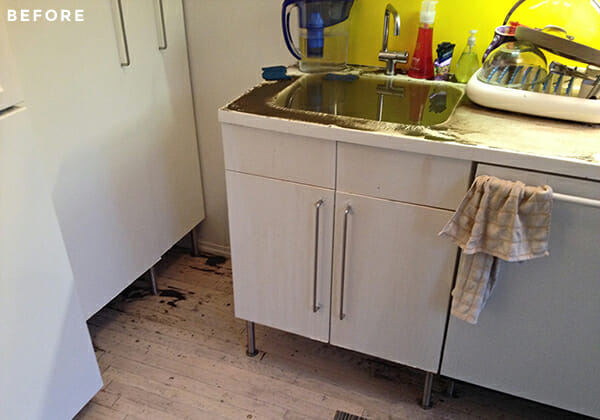
Just as Michelle and I were getting serious about planning the powder room renovation, we suffered more water damage. This time, a clog in the building’s kitchen waste stack caused a backup into our apartment. The grime and sediment that overflowed our kitchen sink permanently stained our white oak floors, white Corian countertop, and waterlogged the IKEA base cabinets. Fortunately, I’ve had plenty of experience handling property damage claims for clients, so I knew that patience and persistence during the insurance claims process was crucial to getting the right settlement to do the work. The other thing that was immensely helpful was being able to use Sweeten to get qualified contractors to provide real estimates that could be used to challenge the insurer’s predictably low estimates. Sweeten brings homeowners an exceptional renovation experience by personally matching trusted general contractors to your project, while offering expert guidance and support—at no cost to you. Renovate expertly with Sweeten
The Project Comes Together
In a sense, the timing of the water damage was perfect. We now had the opportunity to package the powder room renovation and kitchen renovation and flooring repair together. I posted our project on Sweeten, and immediately got served three excellent matches. Based on timing and phasing of the work, we selected Sweeten Expert Santiago’s team. Santiago understood our situation and the disruption that would be required to our daily routines in order for him to do the work. We took a week vacation upstate while the team gut renovated the bathroom. For the new entrance into the bathroom, I converted one of our two hallway coat closets into a vestibule with a small closet. Michelle and I bought tile at a great shop upstate, the Functional Sculpture Tile shop in Catskill. We love the vintage white hex tile that both of our bathrooms had when we moved in, so we were looking for a similar pattern in a darker shade. We chose a dark gray slate hex tile. And we replaced the standard square wall tile with a glossy white cast subway tile lined with bullnose half tile. We took a chance choosing light gray grout with the dark tile and gray grout with the white tile but are happy with its retro modern feel.
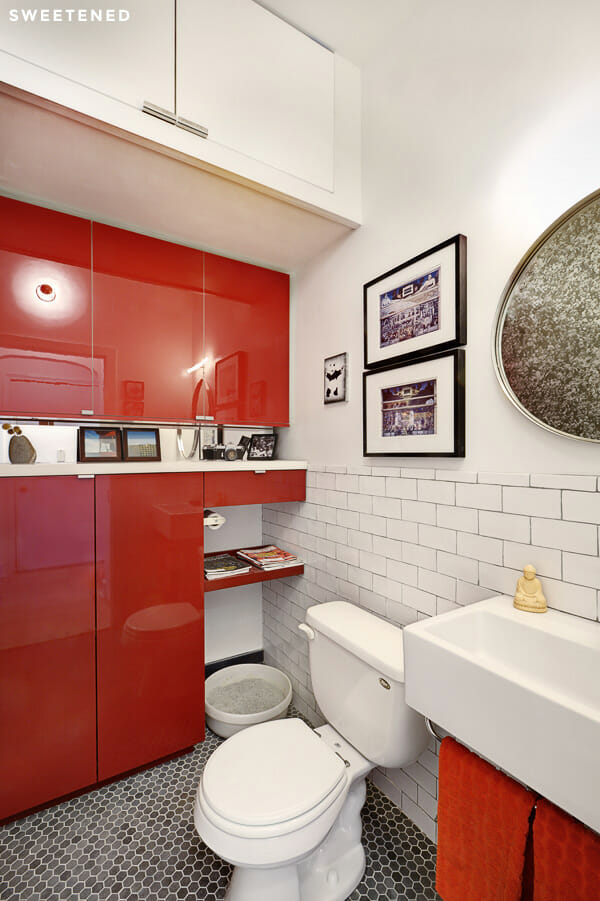
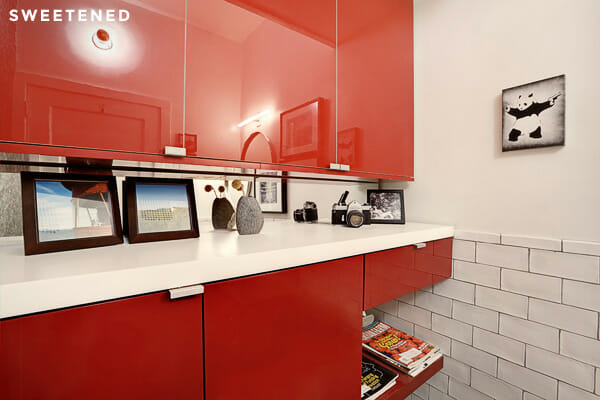

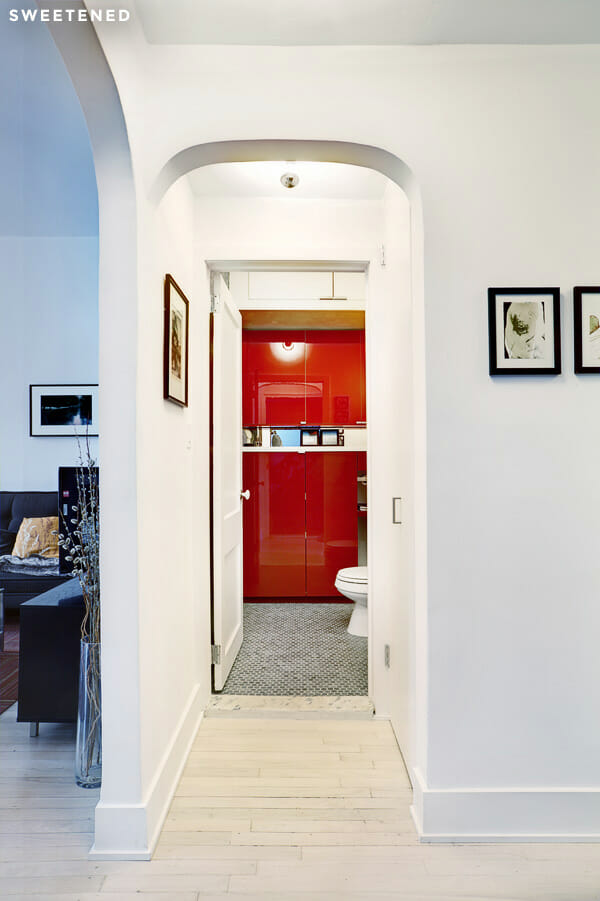
A couple years ago, I had installed some glossy red IKEA wall cabinets, and I now wanted to add matching base cabinets to make up for the storage I’d lost by converting the coat closet to my powder room vestibule. Unfortunately, IKEA had discontinued the glossy red Abstrakt line, so I designed my own cabinets. While more expensive than IKEA, they could be the exact dimensions that we needed in the room. And we could finally incorporate a dedicated cat litter box nook! Sweeten Expert Kris (a fantastic Sweeten contractor with a millwork shop I used on a client’s Manhattan apartment renovation) fabricated and delivered the cabinets while Santiago’s team installed them. I salvaged an undamaged section of the existing kitchen Corian countertop to use on the new red base cabinets and went with a mirrored backsplash in the narrow space between the upper and lower red cabinets to provide a little more optical interest and sense of depth in the room.
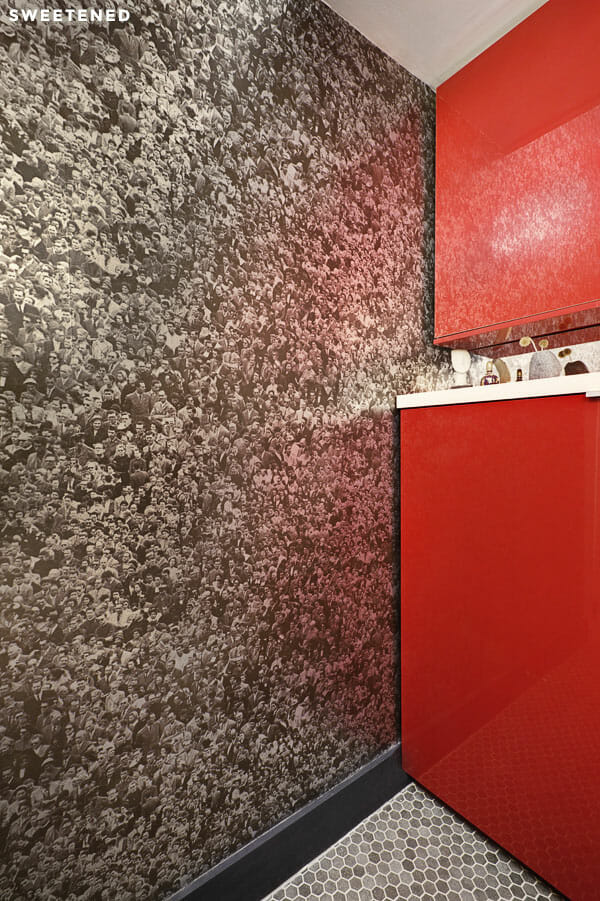
When we closed up the old bathroom door opening to the living room, we were left with a rather tall expanse of wall. We didn’t want to create another “salon” wall of photos, so we thought, why not wall paper? Michelle has always been a huge Andy Warhol fan, so when we stumbled upon Flavor Paper’s Warhol Series, we had to go with it. We chose “Crowd,” a dot screened montage of an Easter Mass crowd at St. Peter’s Basilica in Rome. In a “Where’s Waldo” moment, Warhol supposedly montaged himself into the crowd. The silver mylar finish goes great with the new tile and glossy red cabinets. We bought a more modern Bissonnet sink and faucet from Wayfair, while the round mirror came from IKEA.
In that first week of work, Santiago also replaced all of our old baseboards, installed a new Haiku ceiling fan from Big Ass Fans, and put a fresh coat of zero-VOC paint on all the walls, window trim, and ceiling.


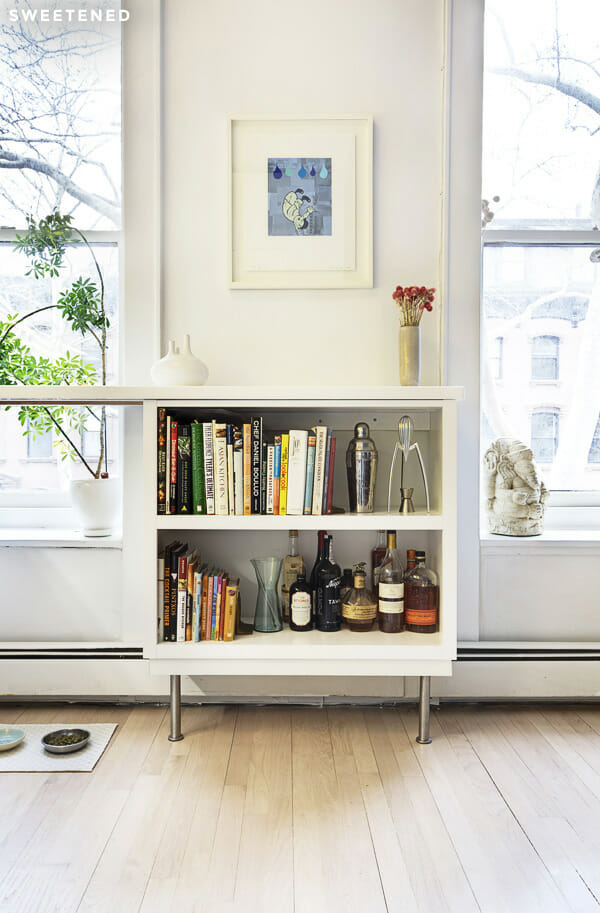
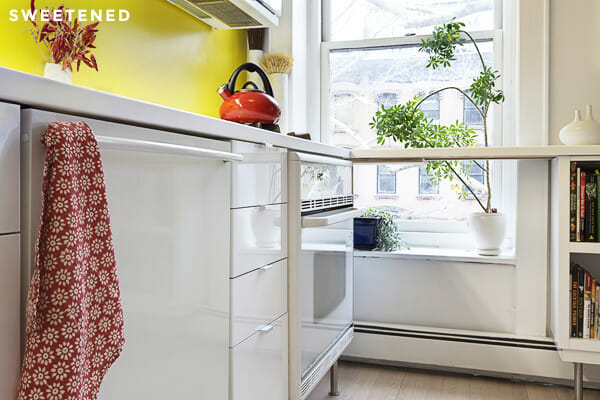
We asked the team to come back three weeks later to do the kitchen and floor refinishing. Even though we had the opportunity to re-imagine the kitchen since a substantial part of it was being gutted, we liked the original design too much to make major changes. So instead, we made a series of subtle changes that could have a nice impact. We decided to paint the entire kitchen wall yellow, instead of just the backsplash. It really livens the space, and it looks great at night from down the block when I see the warm glow through the windows. While we stuck with the same IKEA glossy white Abstrakt base cabinets and new cabinet doors to match (thanks, insurance settlement!), we changed the old wire pulls to more minimal edge pulls. We upgraded our under-cabinet lighting from fluorescent to LED, but kept the original wall-mounted linear fluorescent above the cabinets. And I had Sweeten Expert Kris build an open shelving unit to sit under the narrow leg of our L-shaped countertop. Previously, that end of the countertop had cantilevered awkwardly off the wall. Now, it is more grounded with the cabinet and gives us the ability to display cookbooks and booze!
At the end of that week, Sweeten Expert Santiago’s team had cleaned up, cleared out, and everything was back in place. We replaced the Chilewich woven vinyl mat, and we took the opportunity to lay new Interface Flor carpet tiles. Up went the artwork, and we were ready to host Thanksgiving just a few days later.
While we hope that our water damage travails are behind us, we’re reassured that Sweeten’s network will be there if we need to call on them again. Thanks, Sweeten!
